Quickstart Guide to Creating a Workflow
In this scenario we will invoke 2 methods in sequence using workflow.
(Note: workflows are supported on version 3.0 or higher)
Steps:
- Click on the "+ Workflow" (
 ) button in the main toolbar. This will open up a workflow, called "My Workflow" in a new tab.
- Go ahead and change "My Workflow" another name and click the save button.
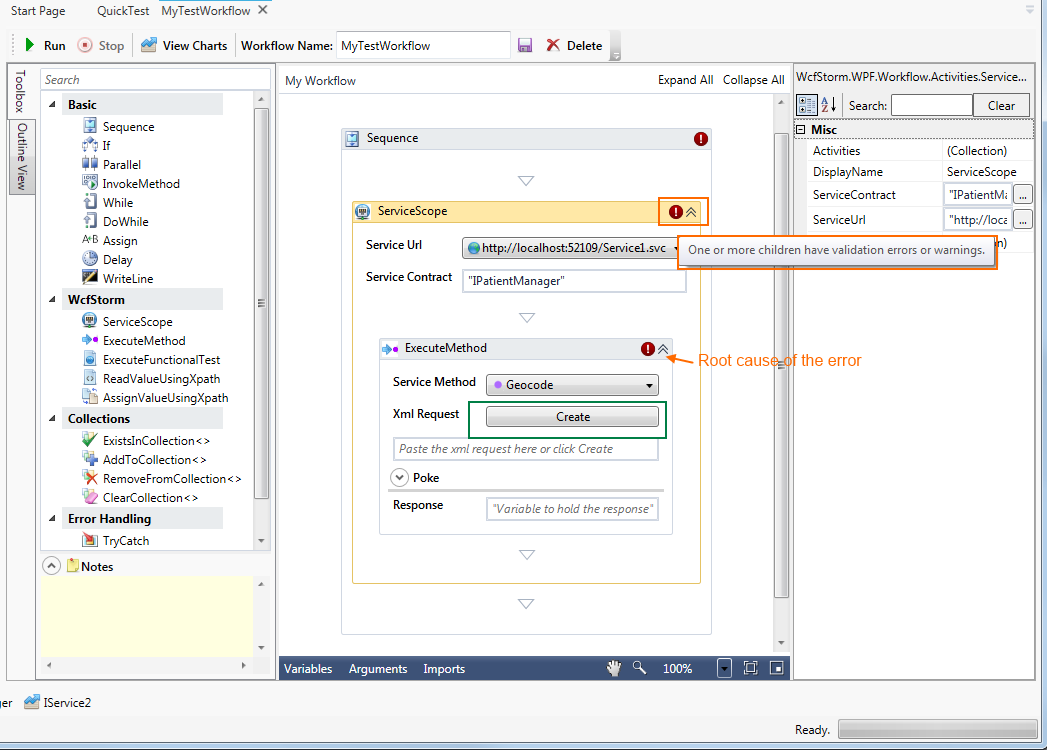
- Shown below is the workflow sequence. By default, wcfstorm helpfully creates a Sequence containing a ServiceScope and one ExecuteMethod activity

Note that the workflow above has errors, as indicated by the red exclamation marks! Hovering the mouse above one of the errors and we get the following message, "One or more children have validation errors or warnings". To get to the root cause of the errors, hover the mouse over the innermost error (the one in the ExecuteMethod activity). Now we are shown the following error, "Value for a required activity argument 'XmlRequest' was not supplied". This is due to the fact that we havent created the XmlRequest yet.
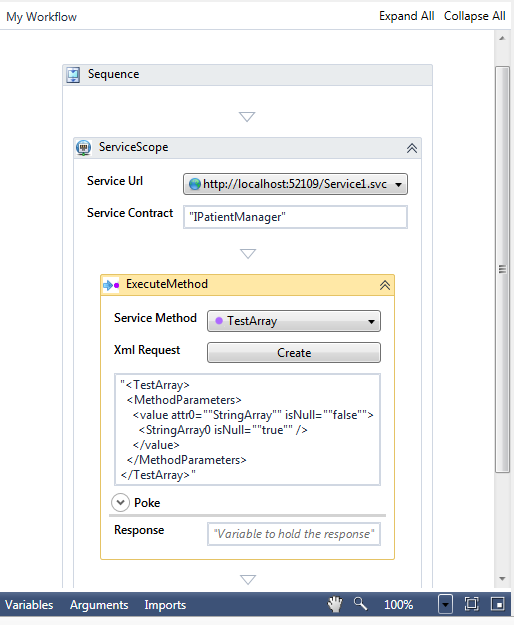
- To fix the error, click on the Create button. This will show a dialog where you can edit the XML request. Click OK when you're done. The newly created will be displayed in the workflow (as shown below)

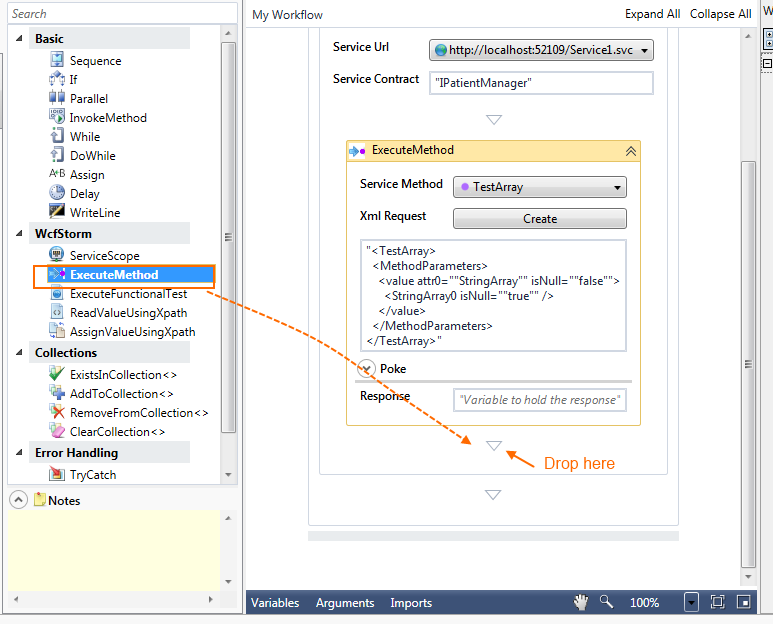
- To add another method to invoke, select the "ExecuteMethod" activity from the designer and drag it to the inside the serviceScope activity as shown below.

- Fix the error on the newly created ExecuteMethod activity by clicking on the Create button.
- Our workflow is now capable of invoking 2 service methods. To execute the workflow, click on the Run button (
 )
)
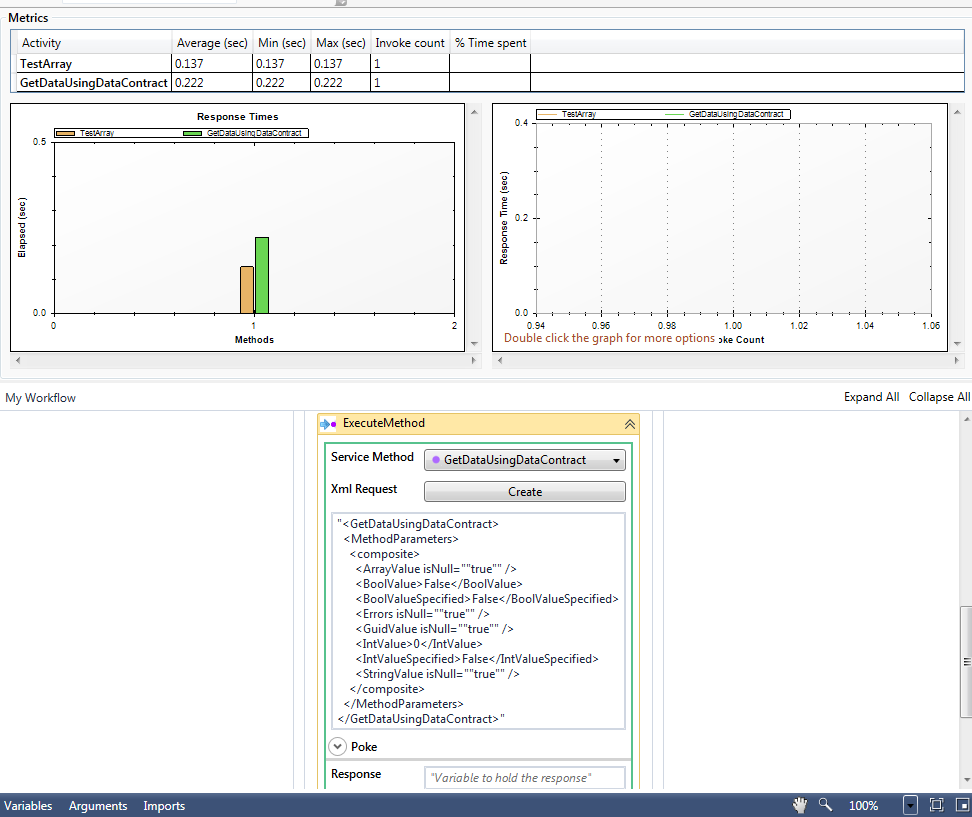
- Shown below is the output of the workflow execution. An activity that did not have any errors, will have the Green border around it. The output will also show some metrics regarding the methods executed by the workflow
