How to run a distributed performance test
Beginning version 2.2, WCFStorm is now able to run a distributed performance test. With a distributed test, WCFStorm test client instances can be started on several machines. Each client can continuously invoke a WCF Service until the performance test case (as specified in its Duration setting) has completed. The results of the test are automatically collected and sent to a WCF Test server which aggregates the results of test clients from several machines.
Below are the steps for running a distributed test.
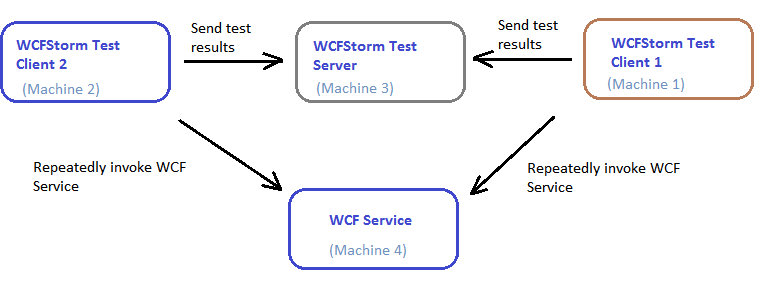
- Identify the test machines that will be used in the test (Machines 1, 2 and 3 from the above diagram)
- Install WCFStorm on the following machines by simply copying over the binaries
- Copy the wcfstormproject folder into the test machines. For instructions on how to create a wcfstormproject, please see "Working with projects"
- On each test machine, open the wcfstormproject then open the specific performance test case that will be executed.
-
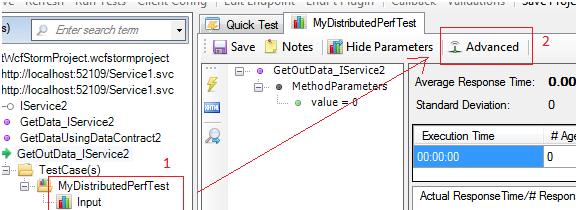
(After opening the perf test case) On the machine designated as the test server (Machine 3 from the above diagram), click on "Advanced" from the perf test menu to open the distributed test config setup window.
Choose "Run a test server" --> Choose a transport (use TCP if the machines are in the intranet) --> Wait for WCFStorm to finish scanning for an open port Then click OK

On Windows Vista, Windows 7 or Windows Server 2008 (R2), the UAC prompt will show. Click yes to allow WCFStorm use the port.
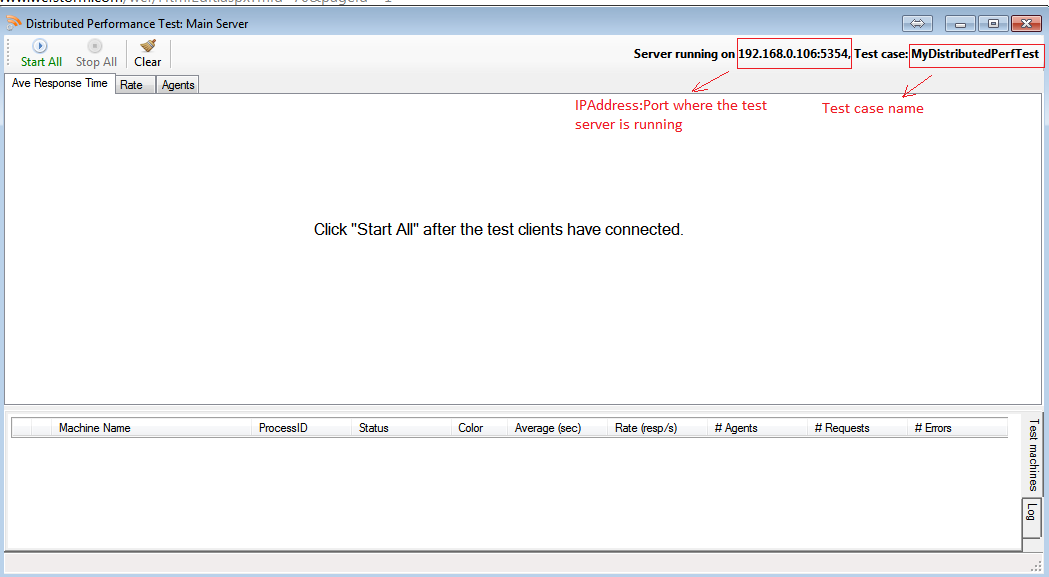
- After clicking OK, the WCFStorm Test Server will be displayed.
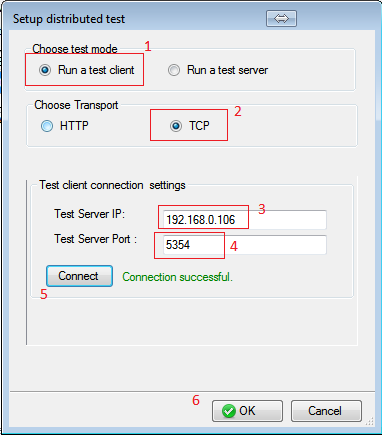
- On the machines where the test clients will be executed (Machine 1 and Machine 2), open the project and the same performance test case. Click on Advanced to bring up the distributed test config window.
Ensure that the Transport, Test Server IP and Test Server Port matches what was configured on the test server in step #5.
Click on "Connect", if successful, a message will be shown. Click OK.
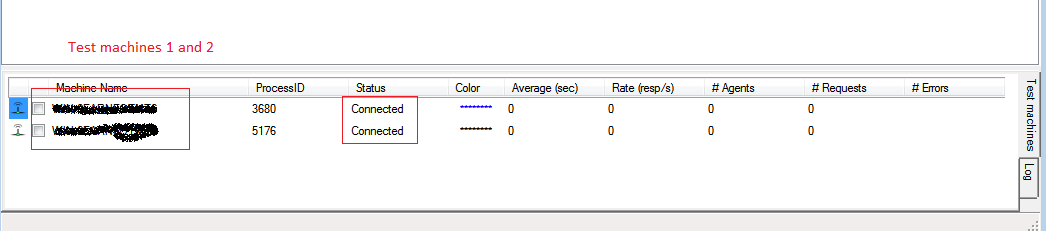
- After both test clients have connected, the test server should now display both connected clients.
- On the test server, Click on "Start All"
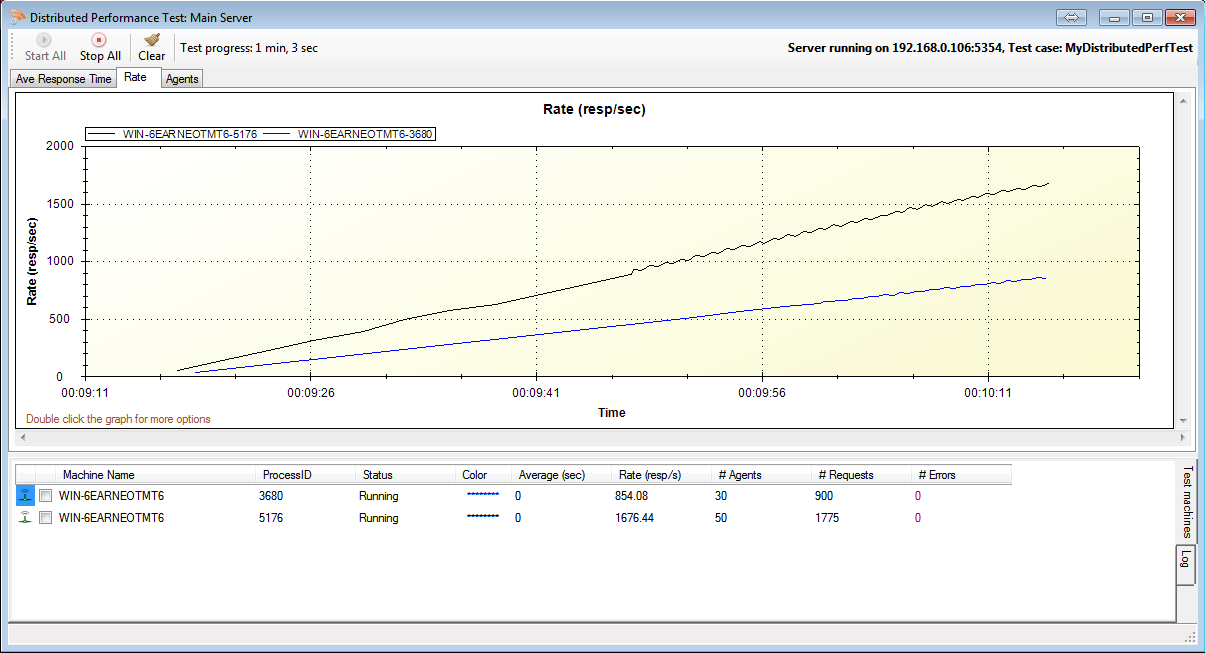
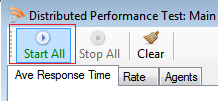 to start the distributed test. The tabs "Average Response Time", "Rate" and "Agents" will show the plots for each test client.
Note: If upon clicking "Start All", you get a "channel has timed out error", please re-do the steps beginning from step #5.
Sample Plot: