Steps to create validations for a functional test
- First create a project then create a functional test.
- In the project explorer window, double click on the test to open it.
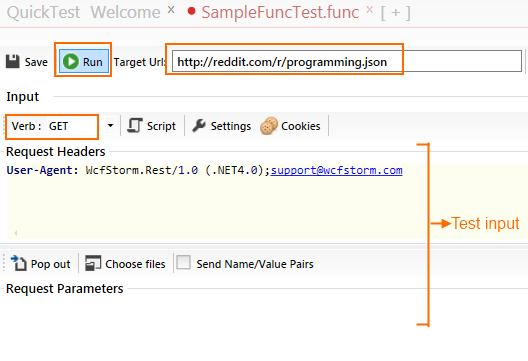
- Edit the test input. The important parts are shown below

- Click on the Run button. Wait for a while until a response is received.
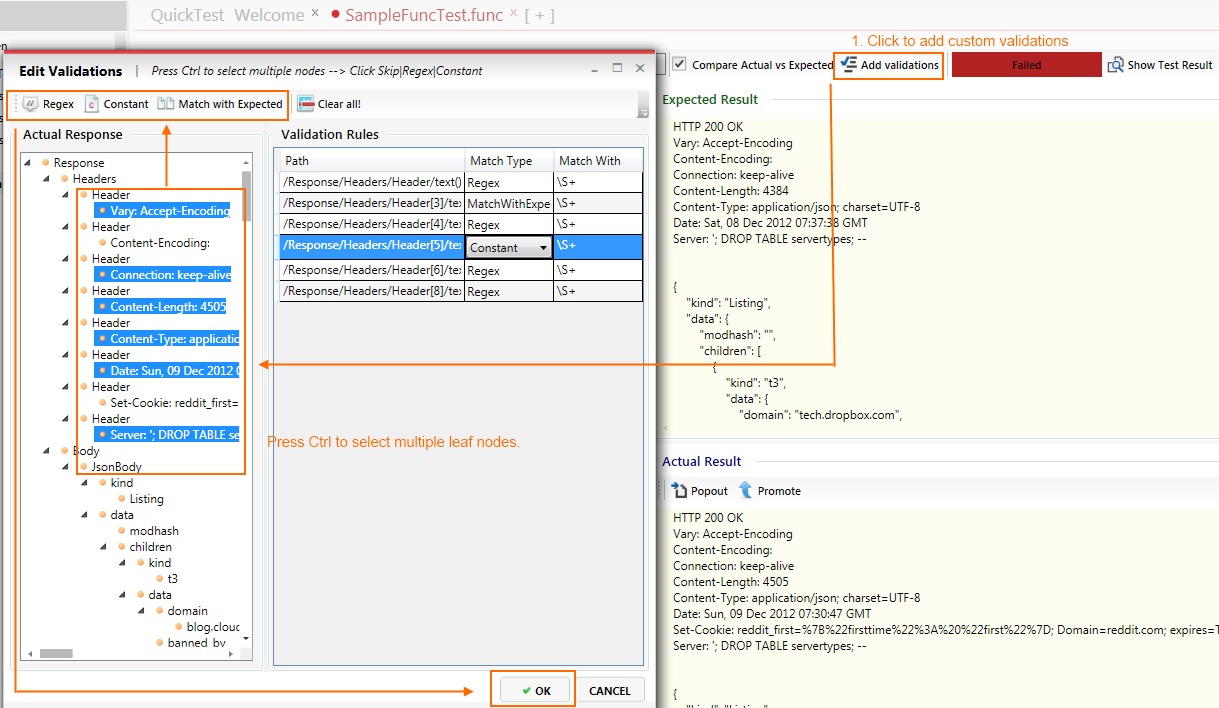
- Check "Compare Actual Vs Expected" to always verify that the actual response matches the expected response
- After a response is received, the "Add Validations" button will become enabled
- Click on Add Validations to bring up the validations window. Click OK when you're done.

NOTE 1: If "Compare Actual is Checked", Wcfstorm.Rest will first do an "exact match" comparison between the expected and actual response before running the custom validations.
NOTE 2: A test is considered "Passed" if any of the below conditions are met
- If there's no expected response or custom validations, the http response code must be must be between 200 - 300.
- If there's no expected response, all custom validations must pass
- If there are no custom validations, (but has an expected response) then the expected response must match the actual response.